|
A QUICK COURSE IN DUTCH OVEN USE |
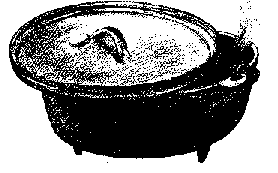
The Dutch oven is the utensil that can make it possible for you to enjoy the same type of foods in camp that you have at home. Success is simple with the Dutch oven. When you achieve this success, the Dutch oven will become a camp necessity. Dutch ovens are most often made of cast iron but are available in aluminum. the most popular sizes are the 10 and 12 inch models. The lid of the Dutch oven is very important. For camp use, it must have a raised lip around the oven's lid. This helps to hold the fire on top of the oven and keeps ashes from sliding off the lid and into your meal when you take the lid off to check your food. Oven pliers or a small pair of channel lock pliers are a must to remove the hot lid for inspection.
CONDITIONING AND CLEANING DUTCH OVENS
A new oven will come with a coating on the inside to
prevent rust prior to purchase. Rust is the #1 enemy of the
Dutch oven. This coasting must be burned off thoroughly
prior to your use for cooking. Until your oven is seasoned
through use, you should grease the inside of your oven before and
after each use. Bacon grease, butter or Wesson oil are
great to grease your oven with.
Scrubbing the inside of your oven after use with a Brillo
pad is not recommended. Nor is it recommenced that it be
washed with soap and water. After use, simply scrape out
remaining food and place the oven with the lid on back on your
hot coals until the remaining food particles cook to ash.
Then scrap the ash out with a green stick, wipe out the oven with
a paper towel and re-grease. The oven should never be
placed in a roaring fire and never pour cold water into a hot
Dutch oven. This could cause it to crack or warp.
HEAT - CHARCOAL AND HARDWOOD COALS
Most prefer to use charcoal as the heat source for the
Dutch oven but hardwood coals work just as well. The
charcoal allows one to consistently apply the same amount of heat
to each different recipe. Usually 12 to 15 coals are
necessary under and on top of your oven for cooking. Your
meal should be checked every 5 to 10 minutes after it is half way
through cooking. If you notice one side of your meal
cooking faster than the other, as in a cobbler crust, rotate the
lid and the oven 180 degrees to re-distribute your top
heat. If using hardwood coals, make sure they are hot and
stay hot. Cold coals will not cook. Your cooking
coals should be placed outside your fire pit for oven use.
It is a good idea to place two small logs nearby. Set them
several inches apart and this makes a great place to put that
hot, heavy lid when you check the food or while serving.
Putting the lid in the dirt or on leaves will only put trash in
your food when you re-apply the lid to the oven.
CIRCULATED HEAT - REQUIRED FOR BISCUITS AND PAN COOKING
Most make the mistake of cooking biscuits or sweet rolls in the oven by placing them directly onto the inside of the oven's bottom. Chances are you will burn them slap up. It is best to place the biscuits into a pie pan or the fry pan of the chef cook kit. Cut yourself three green hardwood sticks about three inches long and 1/4 inch round. Place the sticks into the bottom of the oven to form a triangle for your pie pan to sit on. The space between the pie pan and the bottom of the oven will allow air to circulate in the oven and will yield biscuits that are delicious and pretty.
THE LID AS COOKING EQUIPEMENT
The lid can make a great griddle for frying eggs, pancakes or French toast. It works great for small amounts of bacon and sausage. Just take two small logs like you used for the lid resting place and sit them parallel - about 8 inches apart. Fill the middle with hot coals and turn the oven lid upside down on the logs. Level it and cook away! To clean up any mess, simply leave the lid in place while you eat and let the coals burn off any food particles. Remember the inside of the lid should always be greased along with the oven after each use.
SANDHILL COBBLER - A Simple Recipe
1 - 10 inch Dutch Oven
1/2 - stick of butter
1 - large box of yellow cake mix
2 - large cans fruit pie filling (3 for 12" oven)
small bag of charcoal
cooking time: 40 to 50 minutes
Start the charcoal, put 12 to 18 charcoal
briquets under the oven and spread them out evenly, melt
the butter in the oven, pour in fruit fillings and spread evenly,
pour in cake mix and spread evenly. DO NOT stir fruit and
cake mix together. Cover with lid, spread 12 to 18 charcoal
briquets on top of the oven. Cook 40 to 50 minutes
depending on heat. add additonal charcoal under or top of
oven if needed. Check for "doneness" every 3 to 5
minutes after 30 minutes of cooking time.
REFERENCES:
Dutch Oven Cooking, BSA#3549 and Camp Cooking for Small Groups, BSA#3592
![]()